It’s true that Word has a feature of inserting watermark directly while Excel does not. But with the similar reason (claim the ownership, protect the information from being tampered, etc.), we may also want to add watermarks to Excel files. How can we do it?
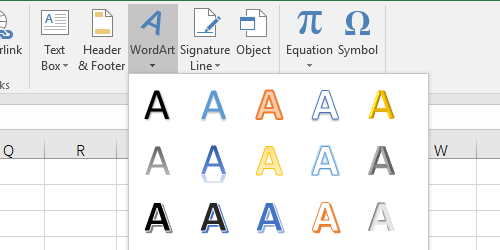
Open the file you want to add a watermark. Click WordArt in Text section of Insert tab.

Choose a style you like in the drop-down list.
Input the content of watermark in the textbox of WordArt. You can drag its dotted border to change the location or drag the points on the border to rotate the text and adjust the size as you like.


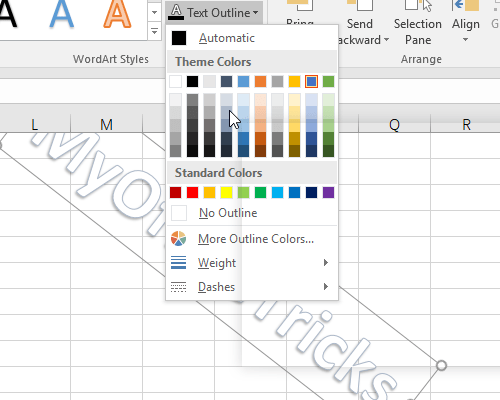
Select the text, you can adjust it in Format (Drawing Tools). The color of watermark shouldn’t be too bright so I click Text Outline and choose the cube of dusty blue in Theme Colors. You can click Text Fill to change the fill color as well.
Click Text Effects – Reflection – Reflection Options…

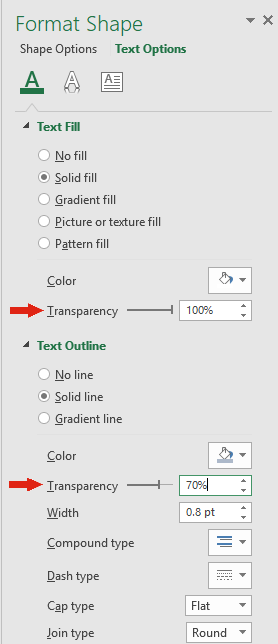
The Format Shape panel will pop out on the right of the page. Switch to Text Fill & Outline. Here you can adjust the Transparency of Text Fill and Text Outline. I set them to 100% and 70% separately. Thus, the text won’t block the content of the file. You can make your own choice according to your need of course.
Now the text already looks like a watermark. If you are not satisfied yet, continue adjusting till it meets your need.
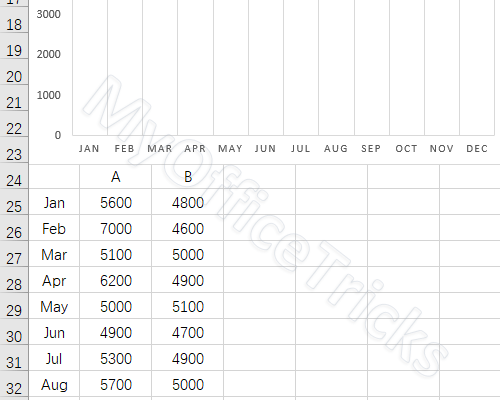
When you finish editing this file, you can save it as the format of PDF. Then the watermark can’t be removed by others.

Leave a Reply