Windows will automatically assign a generic profile picture to each new user account, and have you ever thought it is boring and characterless? Actually it’s easy to replace it with any picture you desire. Here’s how to add change account picture in your Windows 10 PC.
1. Click Start icon at the bottom left of the screen, next click Administrator icon in left pane, then click Change account settings in the pop-up box.

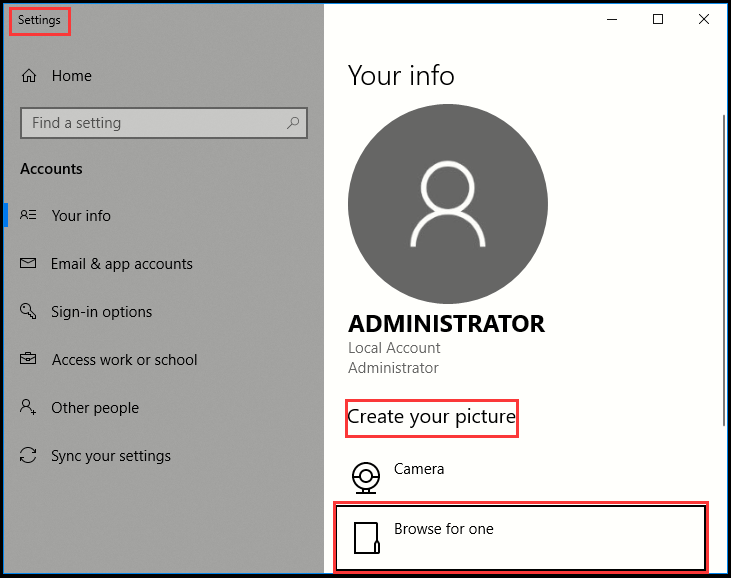
2. The Settings dialog box will display, go to the right pane, under Create your picture section, here I click Browse for one as an example. And you can also click Camera option, which is available only for people with a camera attached to their computers and want to take a quick selfie for their account picture.

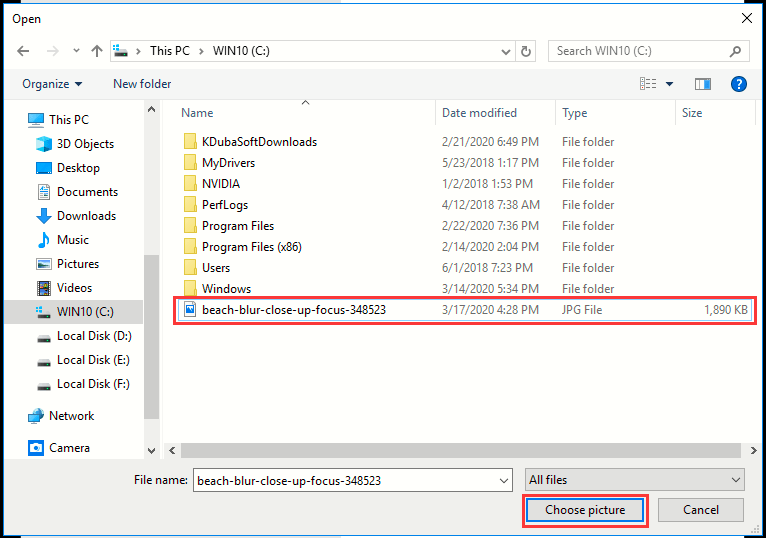
3. Select the desired picture you want to set for your account, simply click Choose picture at the bottom.

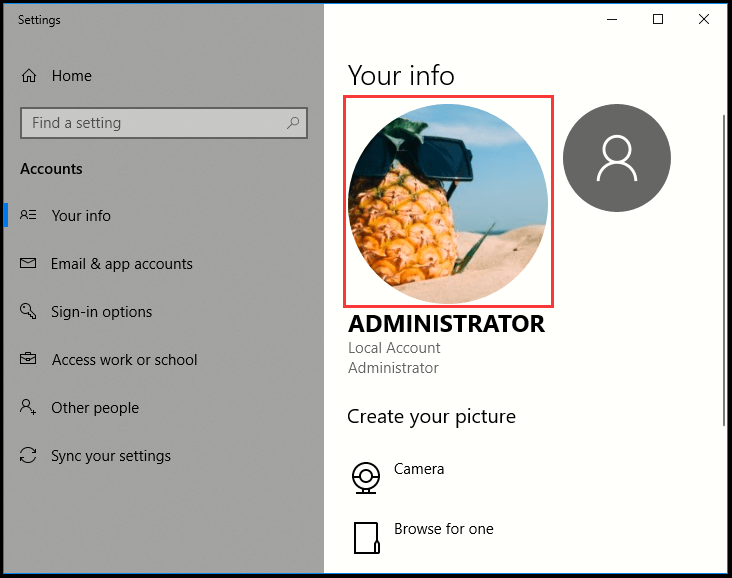
4. Now you can see account picture has been changed accordingly. Only holders of Administrator and Standard accounts can change their pictures (Guest accounts are stuck with the faceless gray silhouette).
5. Note: after you’ve changed account picture, it will attach to your Microsoft account and anything you sign in to with that account: Your Microsoft phone, for example, Microsoft websites and programs, and any Windows computer you sign in to with your Microsoft account.


Leave a Reply