Windows 10 has been added the ability to change the output device with the Settings app. When connecting speakers, headphones, or other audio devices to your PC, you can select which device you want to use by default. So how can we achieve it? Here’s a simple guide.
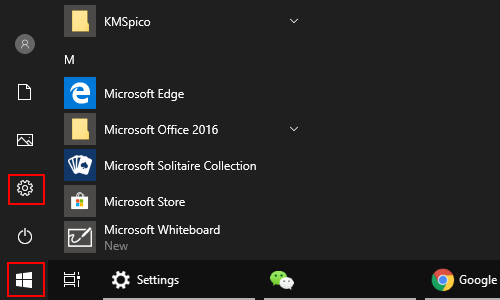
1. Click Start icon at the bottom left of the screen, next click Settings icon in the pop-up window.

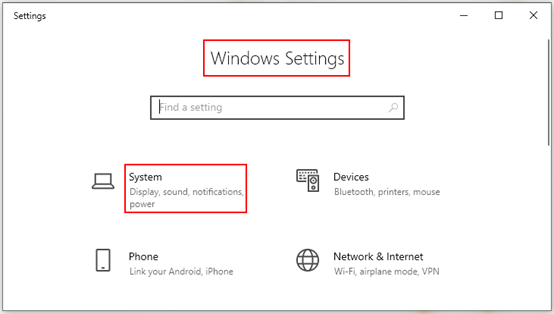
2. The Windows Settings dialog box will display, scroll down and click System button.

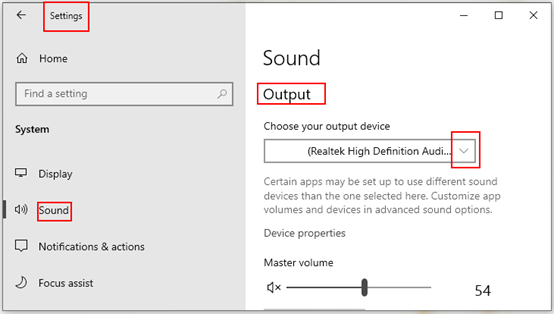
3. Another window of Setting appears, select Sound options in the left pane. Then go to the right pane, choose your output device from the drop-down list.
Note: certain apps may be set up to use different sound devices than the one selected here. Customize app volumes and devices in advanced sound options.

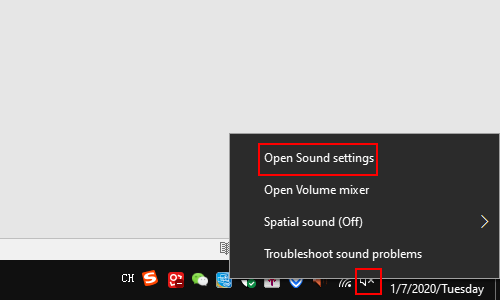
4. There are also slightly faster ways to get to the Sound section from the Settings app. For instance, you can use the search box, or you can right-click the sound volume icon from the task bar, and then click Open Sound settings in the pop-up box.


Leave a Reply