If your computer’s memory isn’t very large, you may sometimes need to allocate a larger amount of virtual memory to keep it running smoothly. So how to change the virtual memory in Windows 10? Here’s a simple guide.
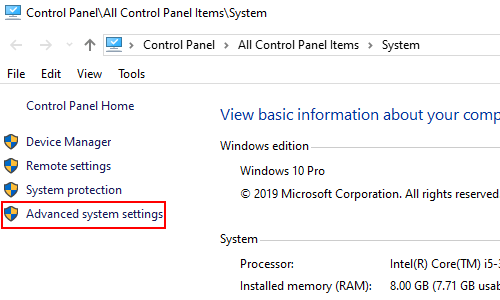
1. Right click the icon of This PC, choose Properties from the menu.
2. Select Advanced system settings under Control Panel Home.

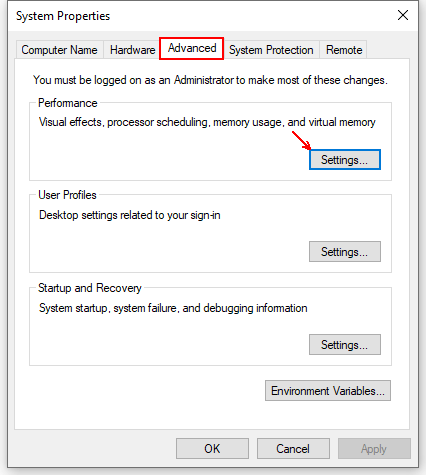
3. Switch to Advanced tab in System Properties, and hit Settings… in Performance section.

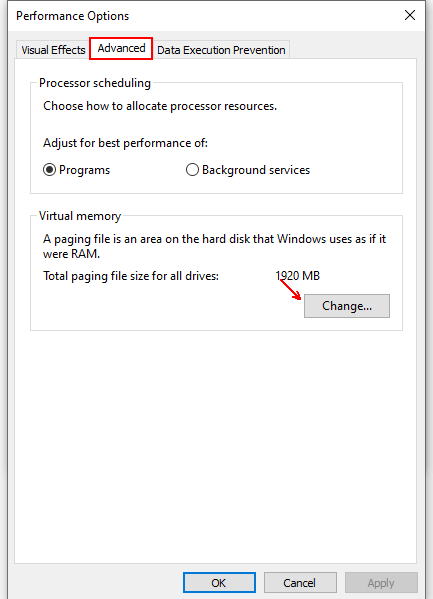
4. Go to Advanced tab when entering Performance Options. Hit Change… button in Virtual memory.

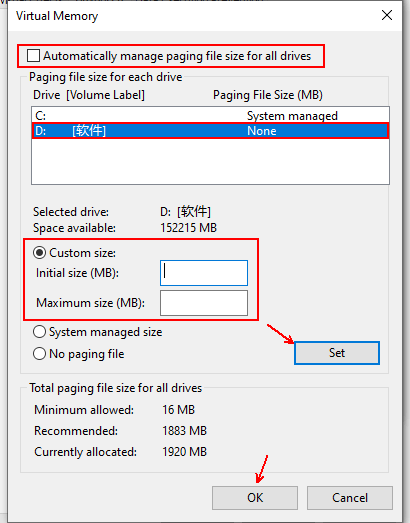
5. Then, uncheck Automatically manage paging file size for all drives. Select D: in the list and check Custom size.
6. Now you can customize the Initial size (MB) and Maximum size (MB) referring to the data in Total paging file size for all drives.
7. After finishing the setting, hit Set button on the lower right, and click OK to confirm it.


Leave a Reply