We all know smoking is harmful to our health, but do you know that secondhand smoking may be even worse. There are always people who don’t care about the feelings of those around them, many of them often smoke in public places or even in the office. Actually we can use Word to create No Smoking sign, which could remind everyone to pay attention to the public environment.
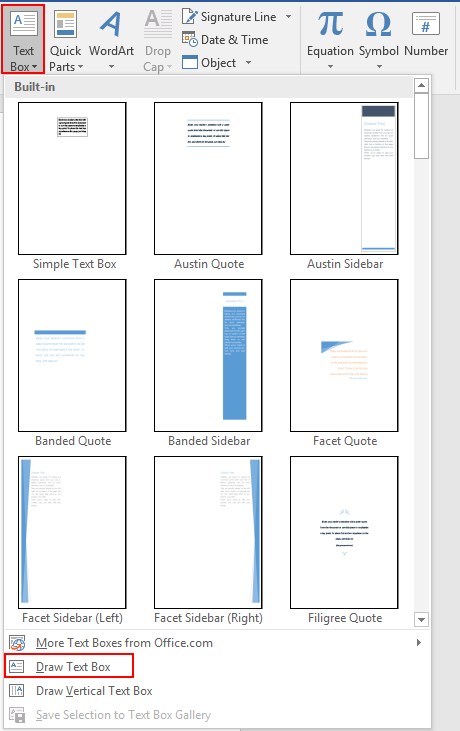
1. Go to Insert tab, click Text Box button and select Draw Text Box in the drop-down box.

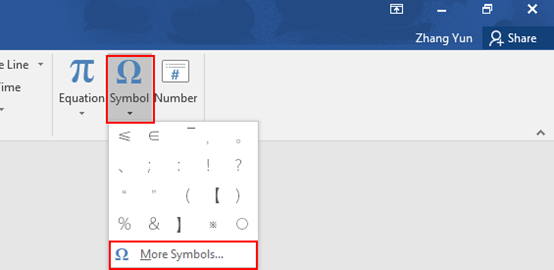
2. Select the text box which just appears, go to Insert tab, click Symbol button and hit More Symbols in the drop-down box.


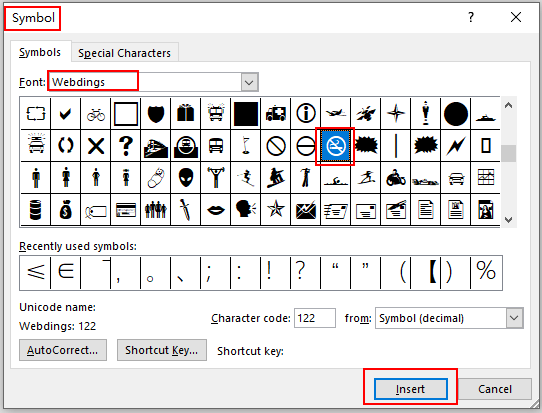
3. The Symbol dialog box will display, select Webdings in the box of Font, find the No Smoking Sign and click Insert.

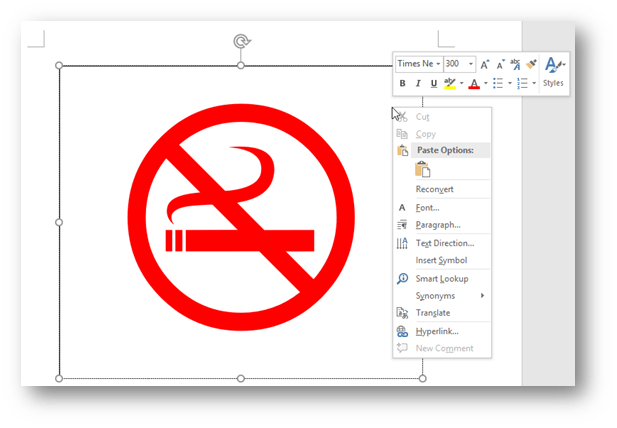
4. Modify the font, size and color of the sign, also make it centralized. Now you can print No Smoking sign and post it on the wall.


Leave a Reply