Many Photo Editing Softwares have the tool to cut out images, but for many people, the software of Photoshop is still very difficult. It does not matter. Today this article will teach you two methods to cut out pictures in PowerPoint. It’s very simple and useful.
1.Remove Background
Actually, PowerPoint comes with the function of Remove Background, we only need to select the picture.then click [Format] and [Remove Background]. Now, you can follow the four options below to start to edit your picture.

If the shape of things in the picture is very regular, then you don’t even need to mark it. But if the shape is irregular, you need to do it yourself. The following two Graphics Interchange Formats can explain these two situations to you.
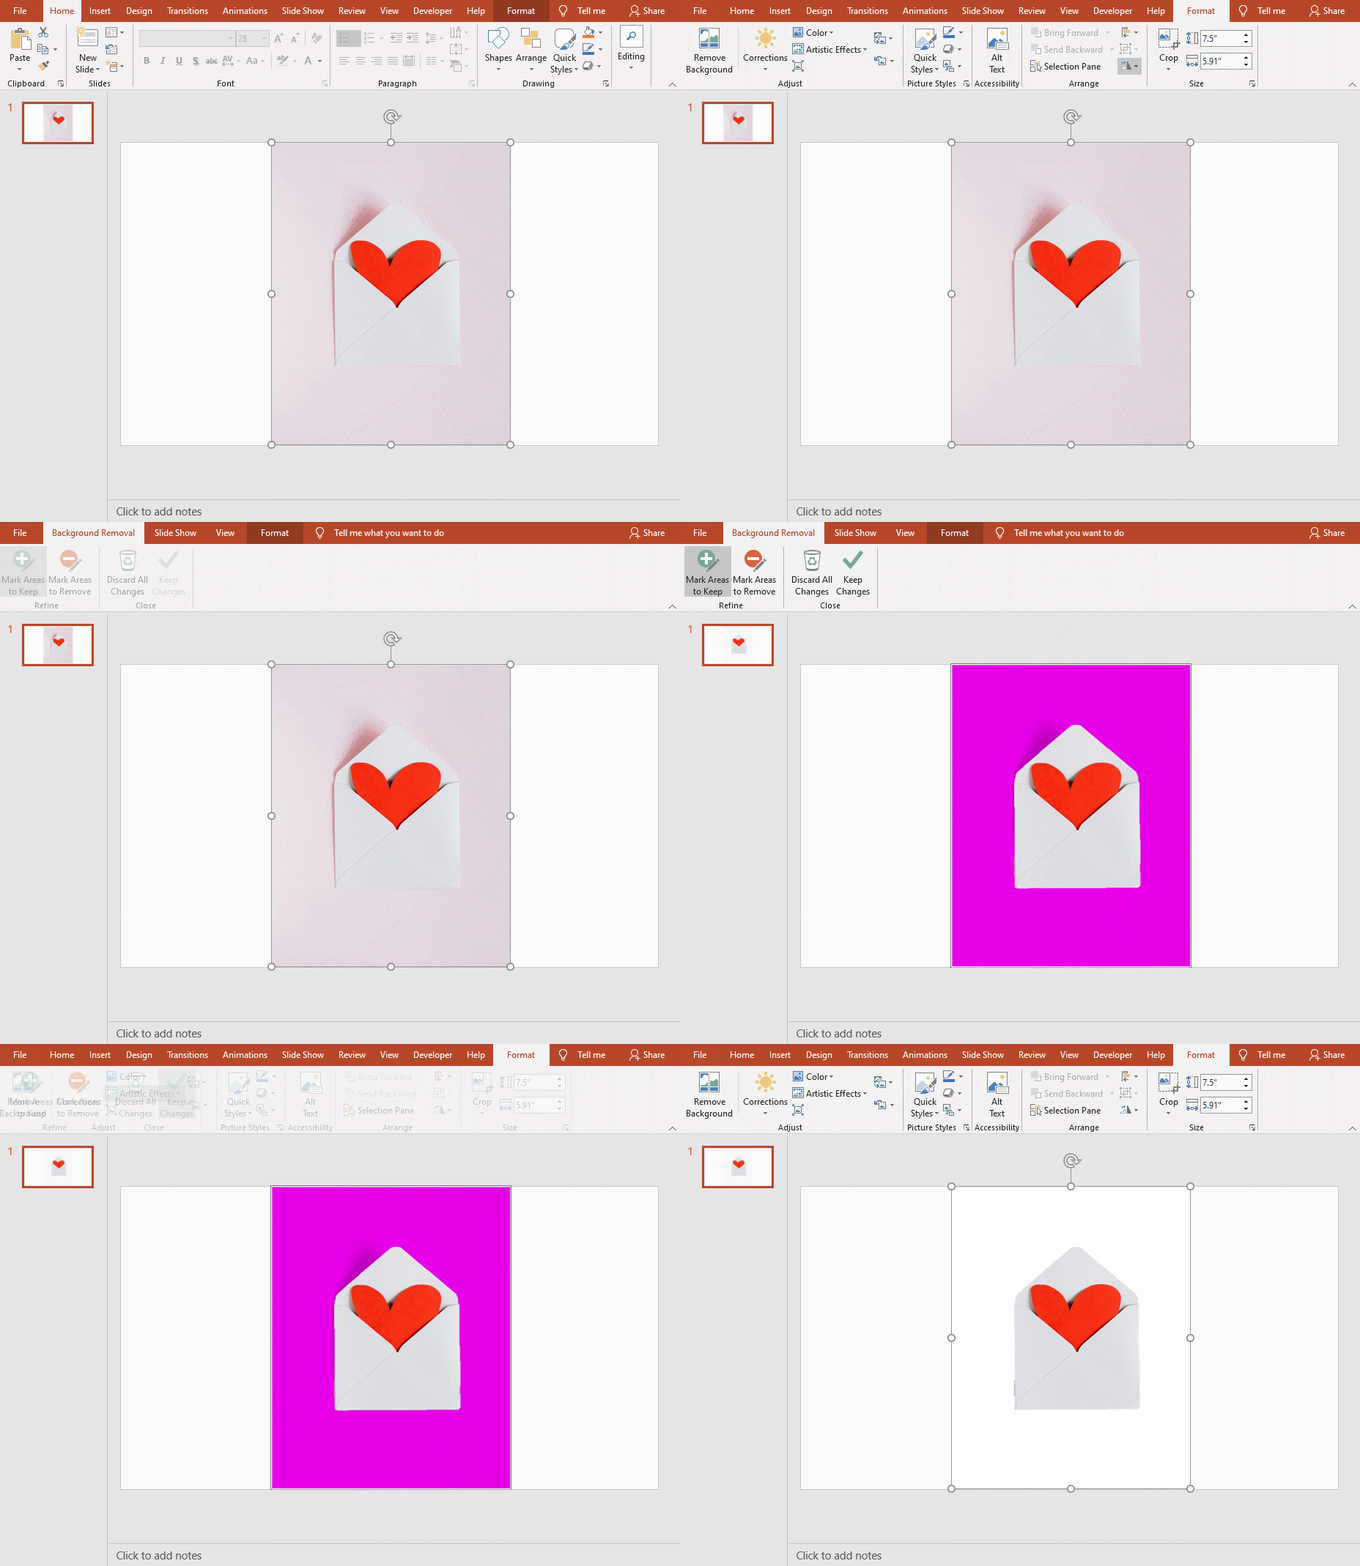
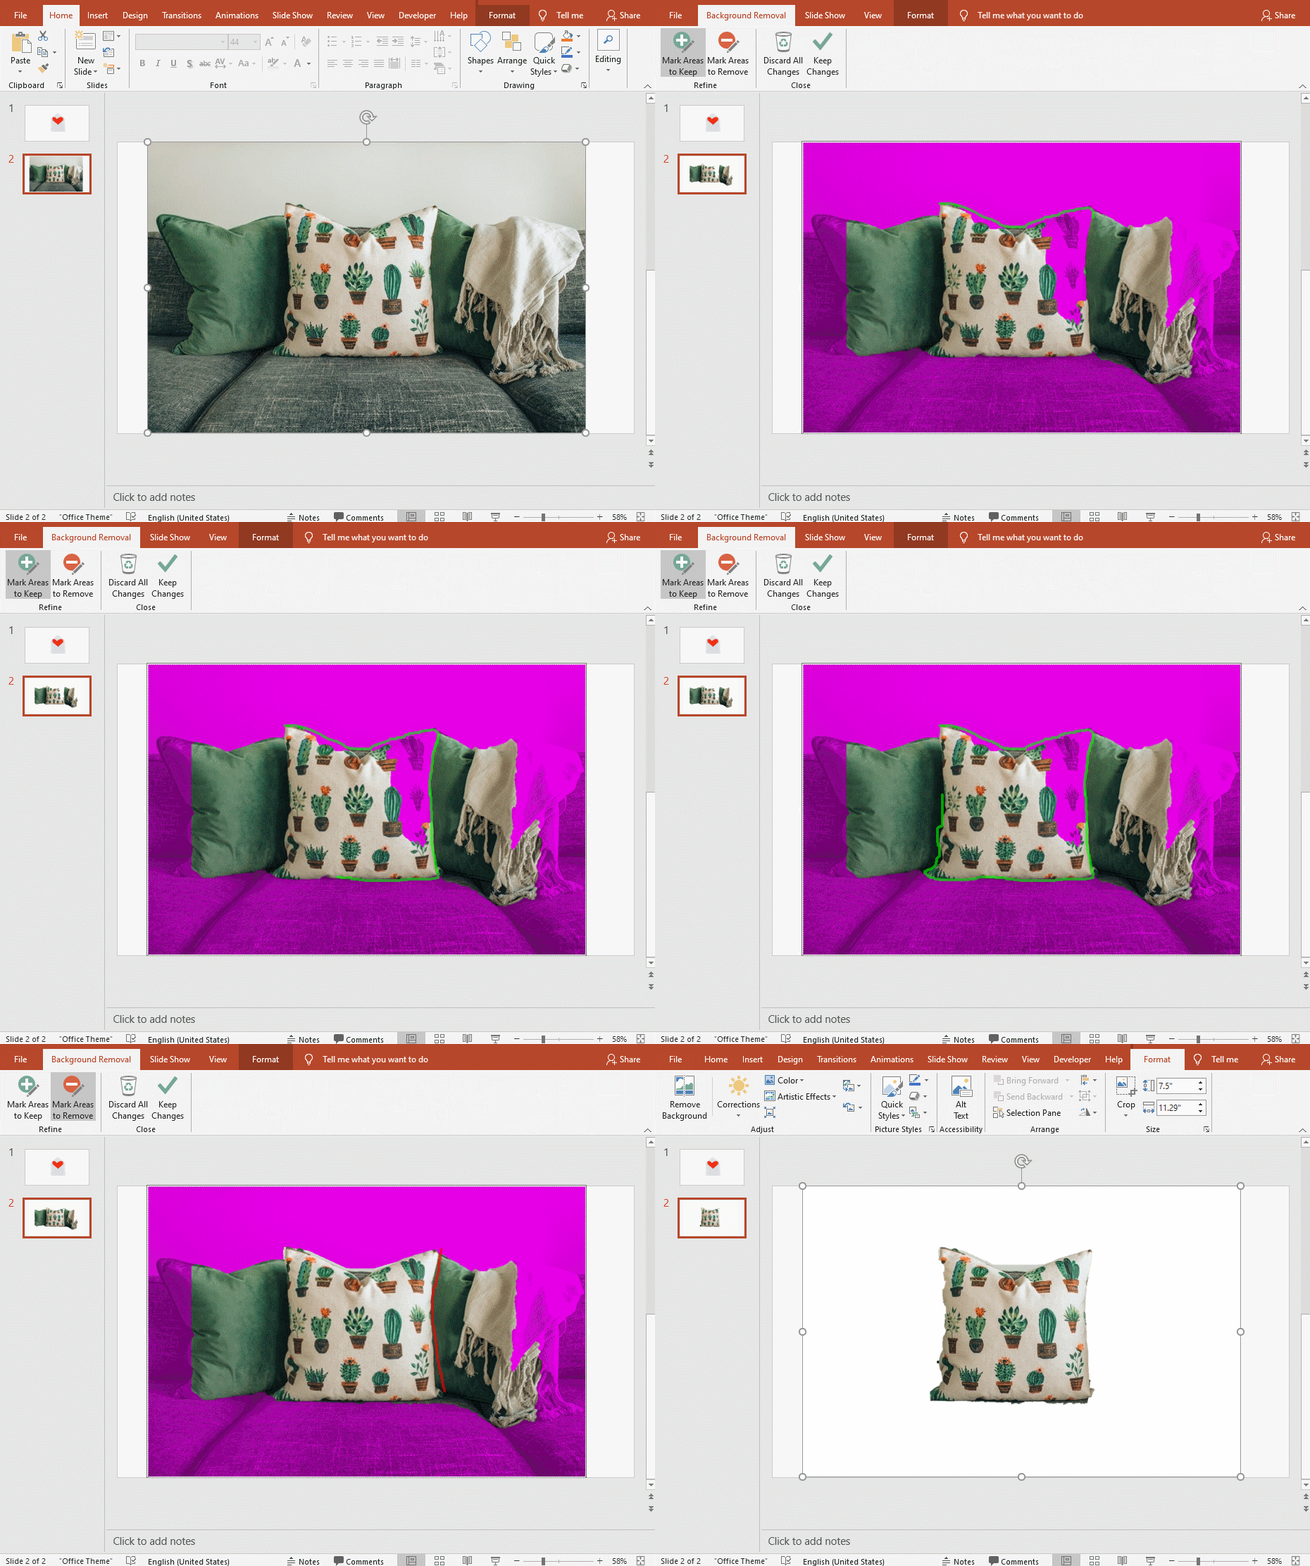
But when marking things with irregular shapes, you need to be patient and not sloppy like the author.
2. Curve Editing
This method will be a bit more complicated than the first method, but the effect will be better.
(1) Insert A Curve
This is only the first step. You’d better click a few more mouse clicks to make the curve better contain the graphics you need.
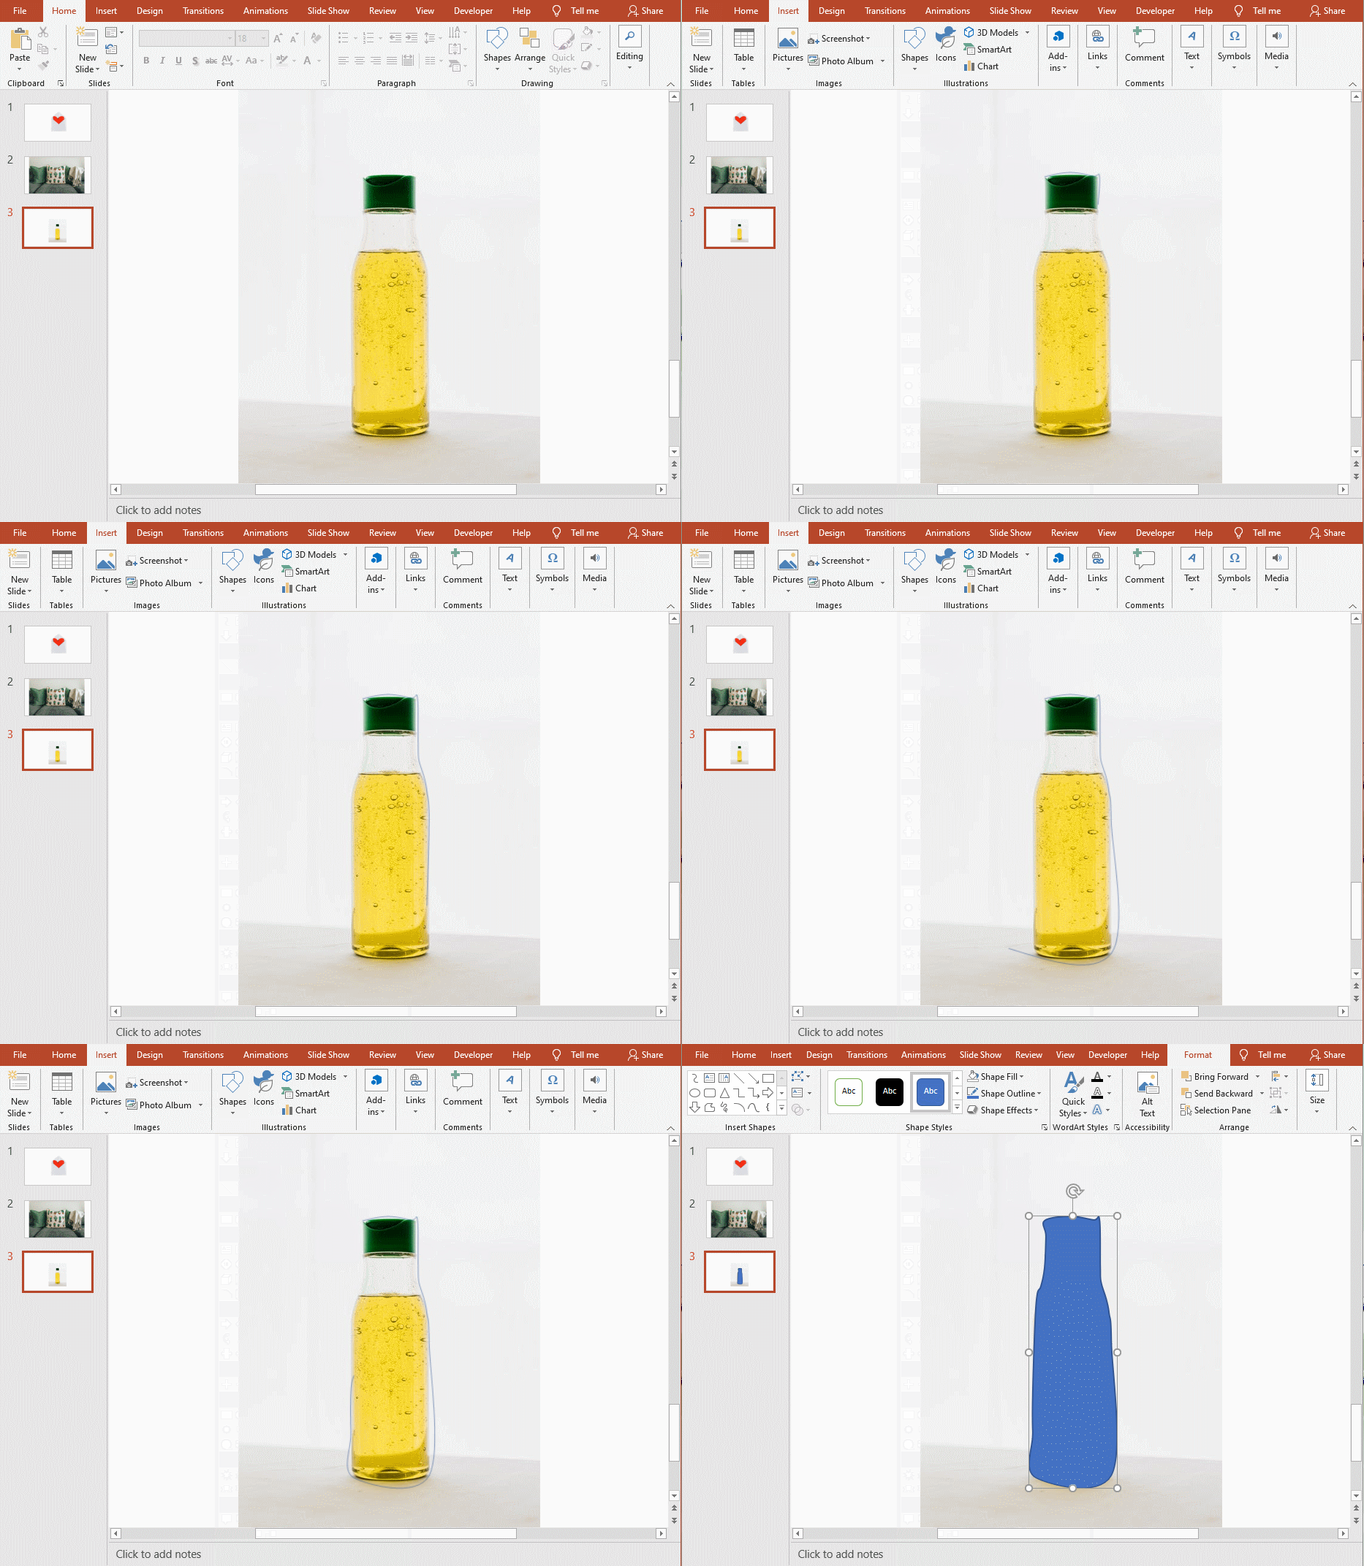
(2) Adjust Points
After completing the first step, we click Format and set the Shape Fill to No Fill. Then click the right mouse button to click the line and select Edit Points.
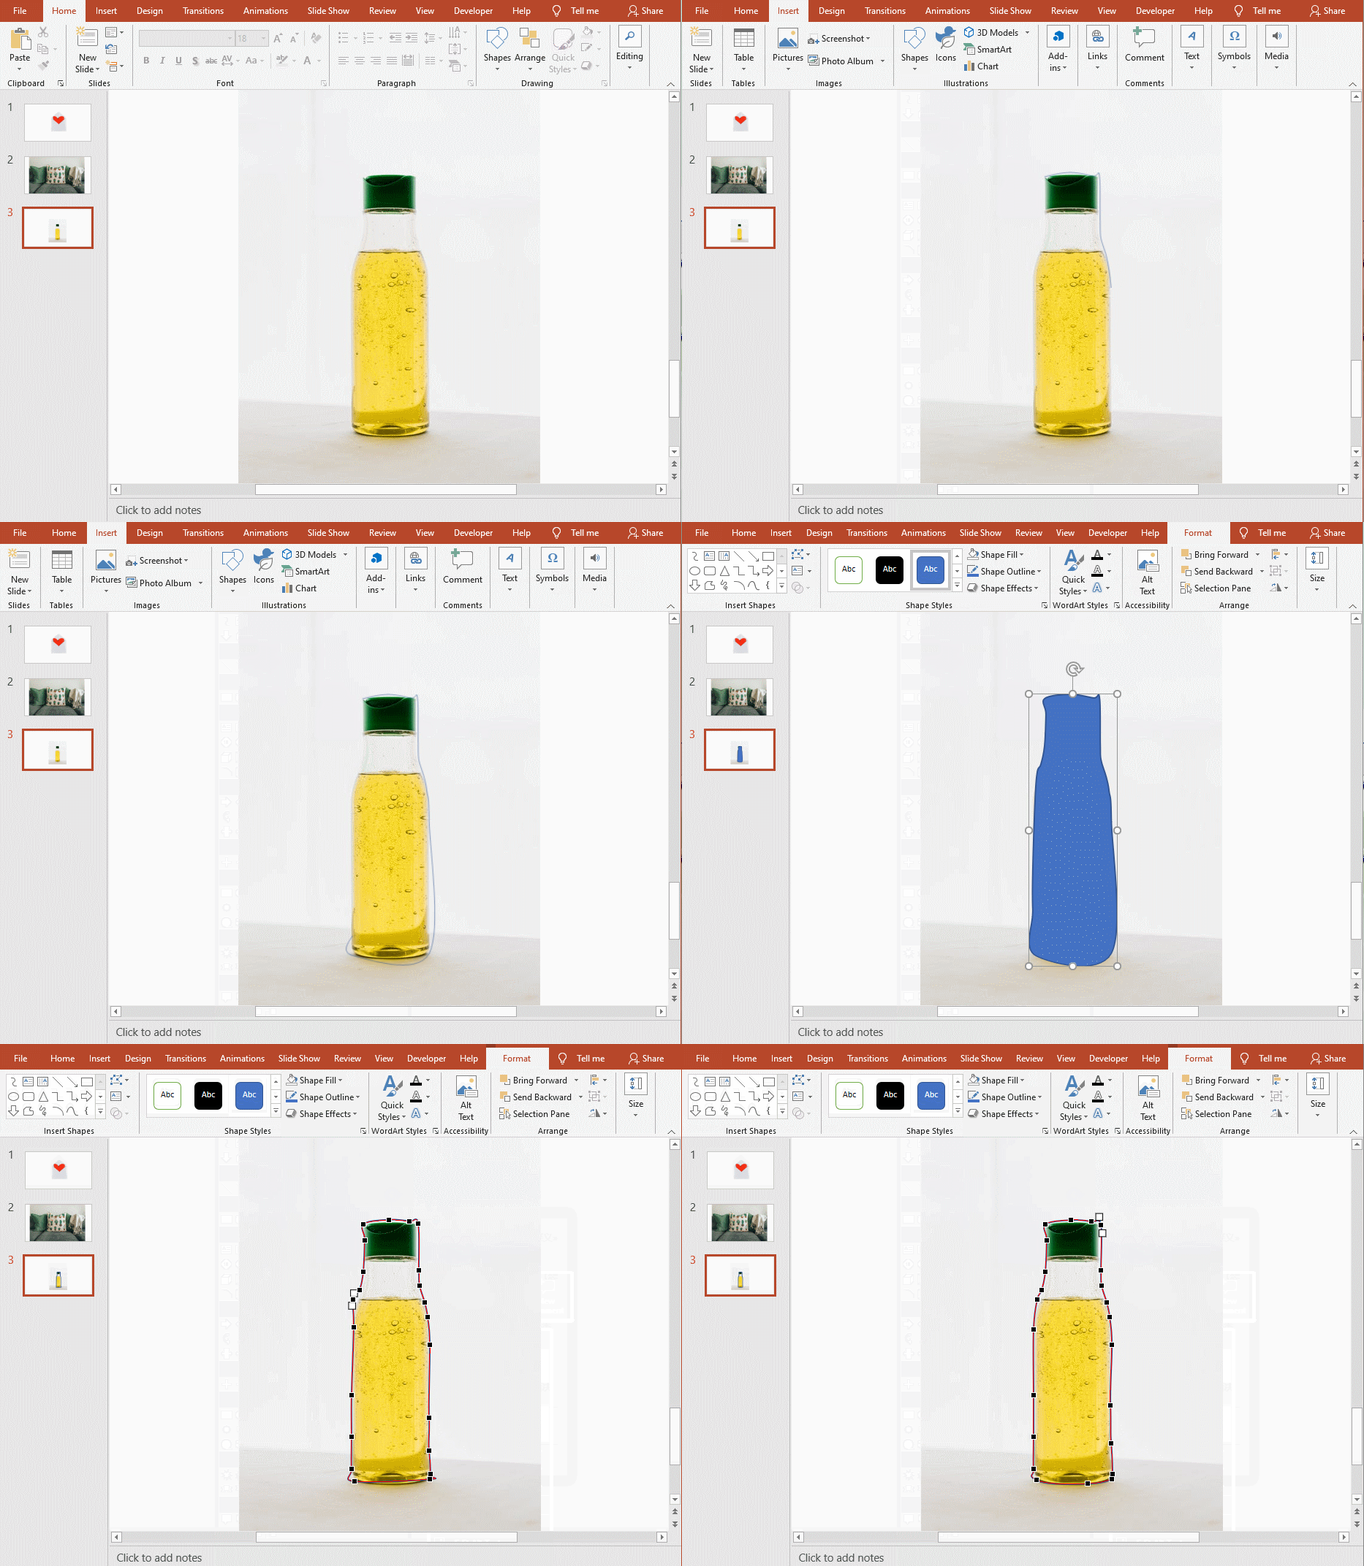
This is the most careful step we should take. It’s directly determines the final effect.
(3)Merge Shapes
Now, we need to right-click the background image and the curve we have adjusted at the same time. (Just click on the background image and hold down the Ctrl key and click on the curve.) Then, we click the Format under the Drawing Tools and choose Intersect from Merge Shapes. Now, you have got a perfect picture.

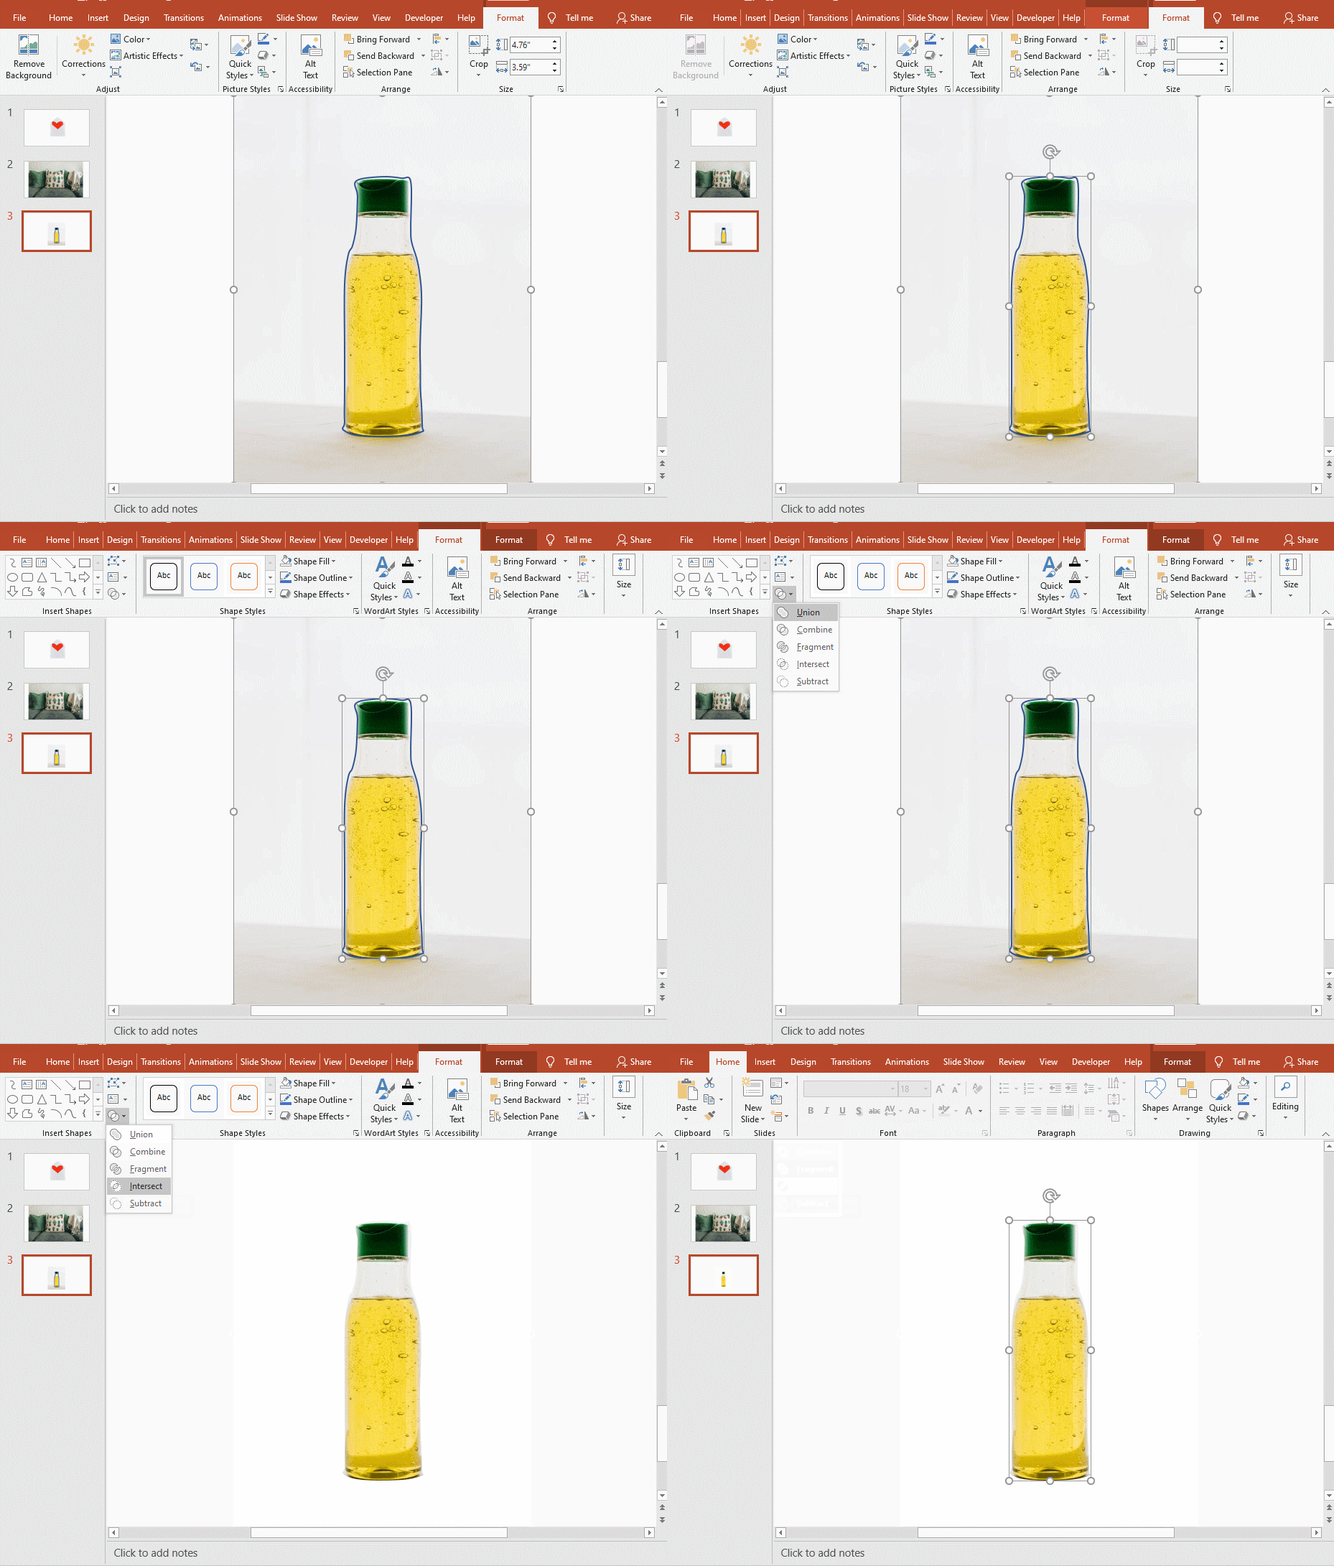
The first method is simpler than the second method, but in fact, you need to decide which method to choose according to the situation. The author thinks that the effect of the second method will be better, but the first method will save you more time.

Leave a Reply