Windows 10 has a feature called offline files which could keep copies on your computer of files stored on the network and allow you to work with them even when you are not connected or a server is unavailable. The next time you are connected or the server is available, all offline files on your computer will automatically sync to the network files on the server to update. So how can we enable it? Here’s a simple guide.
1. Click Start icon at the bottom left of the screen.

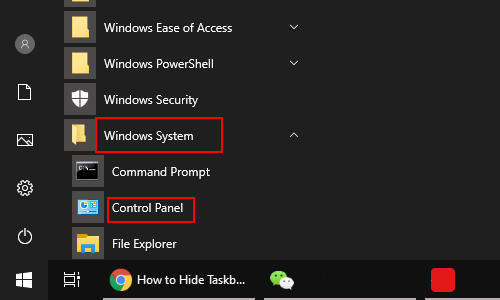
2. Go to the middle pane in the pop-up window, scroll down and click Windows System, then select Control Panel in the drop-down list.
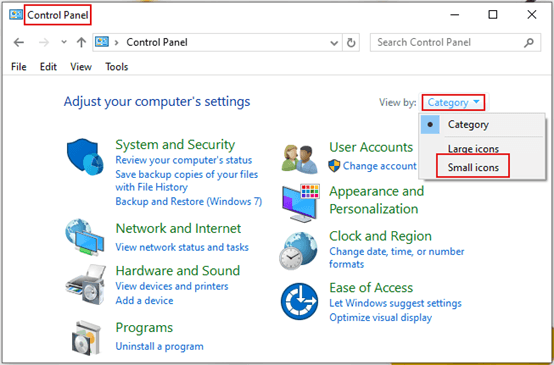
3. Control Panel – Now hit Category and select Small icons.
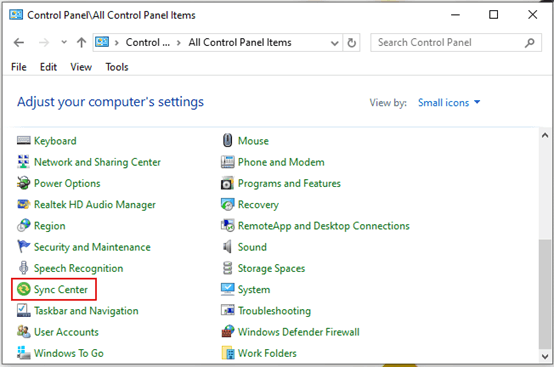
4. Control Panel\All Control Panel Items – All the hidden icons will appear, scroll down to find Sync Center and single click it.
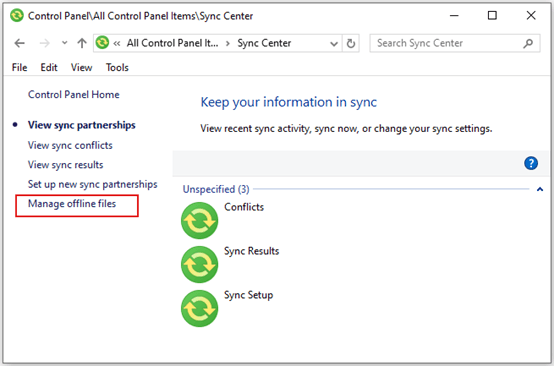
5. Control Panel\All Control Panel Items\Sync Center –
Click Mange offline files in the left pane, which is under View sync partnerships.
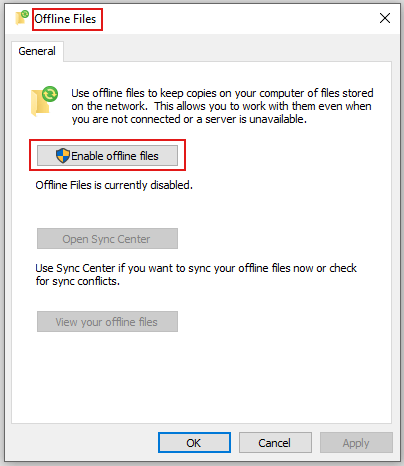
6. Offline Files – Simply click Enable offline files and hit OK at the bottom to save the settings.

Leave a Reply