When the Admin Approval Mode is enabled, the local administrator account functions like a standard user account, but it has the ability to elevate privileges without logging on by using a different account. In this mode, any operation that requires elevation of privilege displays a prompt that allows the administrator to permit or deny the elevation of privilege. If Admin Approval Mode is not enabled, the built-in Administrator account runs all applications by default with full administrative privileges. By default, Admin Approval Mode is set to disabled.
docs.microsoft.com
If you want to enable it, here’s a simple guide you can follow in Windows 10.
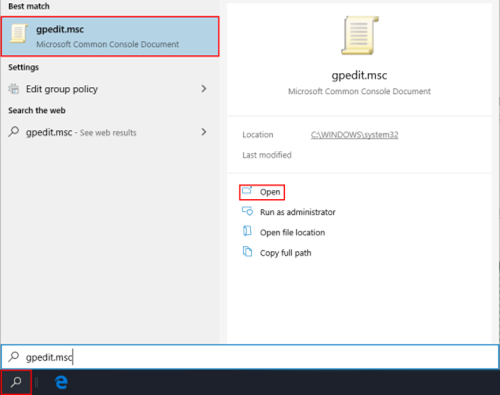
1. Click the icon of search box at the bottom-left corner, and type “gpedit.msc” in the textbox to search.
2. Press [Enter] key or hit Open button to run it.
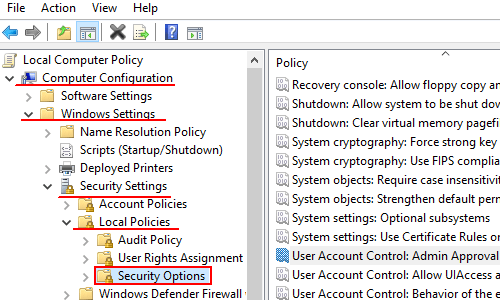
3. Click Computer Configuration > Windows Settings > Security Settings > Local Policies > Security Options.
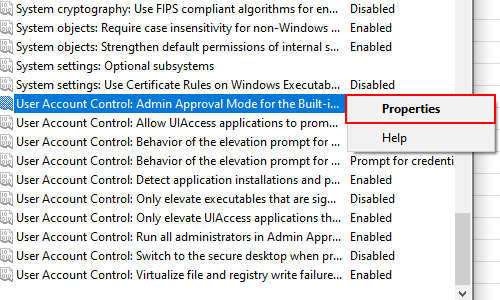
4. Find the option of User Account Control: Admin Approval Mode for the Built-in Administrator account on the right. Right-click it and choose Properties in the menu.
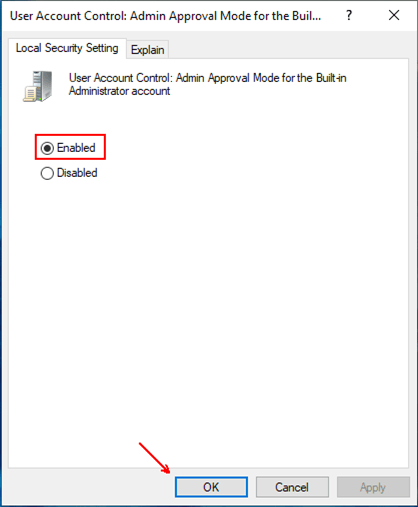
5. Check Enable in Local Security Setting tab and hit OK to confirm it.
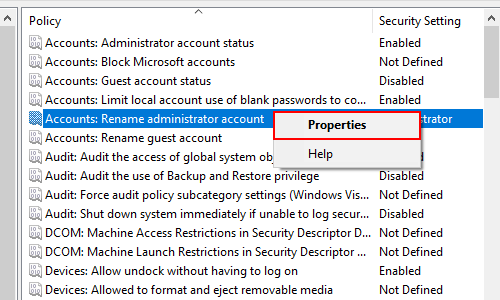
6. If you want to rename the Admin account, just scroll up to find Accounts: Rename administrator account, and right-click it to choose Properties.
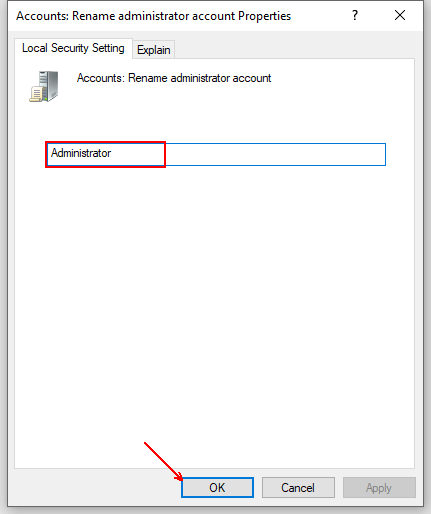
7. Then enter the new name for the account in the textbox, and click OK to implement it.
8. Restart your computer and all your settings will be effective.

Leave a Reply