To satisfy certain requirements, you may need to insert some curly braces into Word document or Excel spreadsheet. But in addition to regular curly braces, sometimes the curly braces with customized size that can contain several lines of text are also needed. In this post, I’ll introduce 4 commonly used methods to insert both regular and customized curly braces. The screeenshots are based on Word, but the steps are almost the same in Excel.
1. Keyboard Input
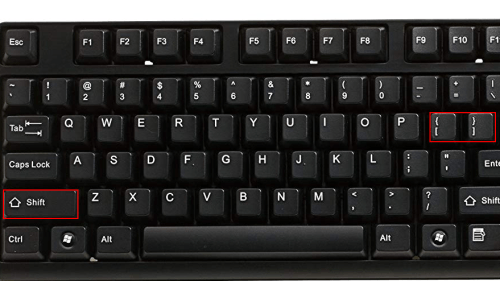
For regular curly braces, you can find the corresponding keys on the keyboard. Just hit the right key while pressing and holding [Shift], and the curly braces will be entered immediately.
2. Insert Equation
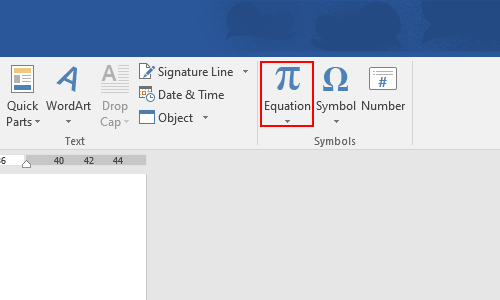
Go to Insert tab, click Equation in Symbols section.
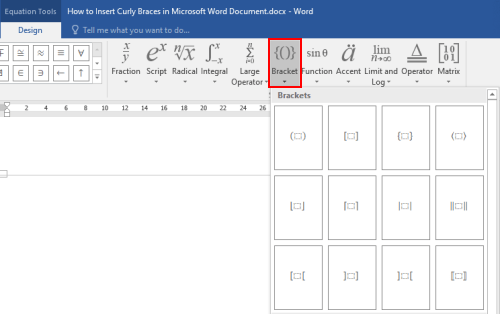
You will be guided to Design (Equation Tools) tab then. Click Bracket to expand the drop-down menu. Here you can find all kinds of brackets, just select the curly braces (or single curly brace) to insert it.
3. Insert Shapes
Switch to Insert tab and choose Shapes. You can find the curly braces under Basic Shapes. It’s ok if you only want the left bracket or right bracket of it, just choose the corresponding bracket.
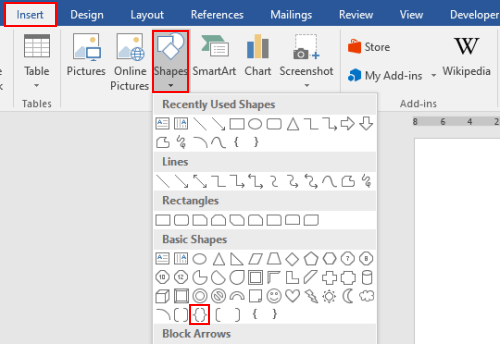
The brackets inserted in this way can be customized as you like. Drag the border to adjust its size, direction and location till you are happy with the result. Moreover, you can even change its color and effect.

4. Microsoft Equation 3.0
Go to Insert tab and choose Object > Object…
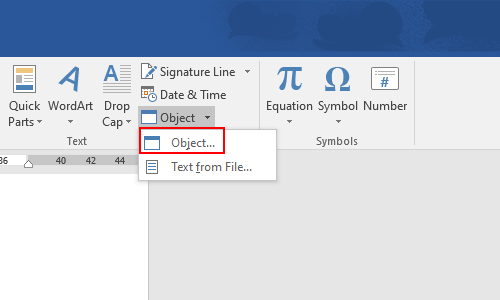

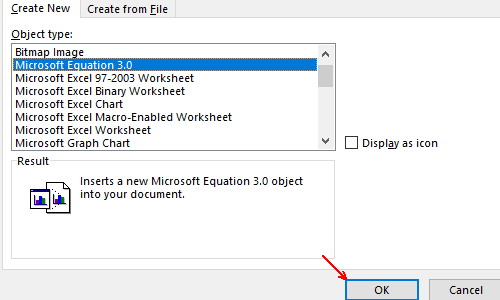
Select Microsoft Equation 3.0 in the list of Object type under the Create New tab. Click OK to implement it.
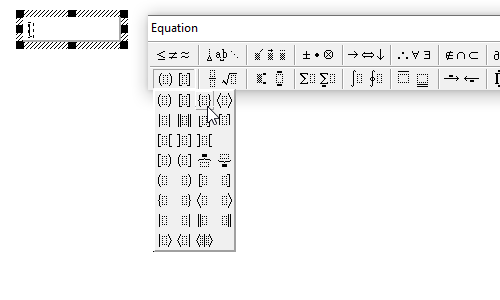
Then the Microsoft Equation tool will pop out. Click the bracket icon on the bottom-left corner to expand the menu, and select the curly braces in the list. It will be inserted to your document immediately.


WONDERFULL KNOWLADGE