When editing documents in Word, you must have seen some colorful wavy lines under the text, which make the whole layout untidy. These wavy lines are actually informing you that there’s something wrong with your words or sentences. It’s automatic but not always accurate. So, how to remove all these wavy lines in Word?
1. First, open the Word document and switch to Review tab.
2. Click Language – Language – Set Proofing Language…

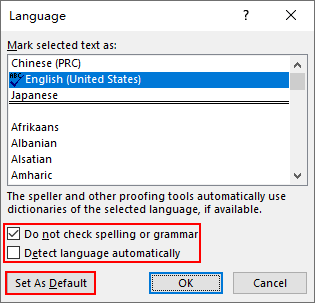
3. In the popping out window, check Do not check spelling or grammar and uncheck Detect language automatically, then click Set As Default.

4. Choose Yes to confirm it. If you want to set another language as default, select the one you want before clicking Set As Default.

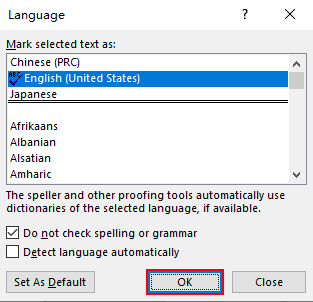
5. Hit OK to quit the Language window.

6. Now the setting has been applied to your document. You won’t be bothered by the wavy lines again. But please note that you won’t be reminded of any spelling mistake as well.
Note: if you want to remove only some of the wavy lines, just right click the marked words and choose Ignore Once in the list.


Have you ever thought about creating an e-book or guest authoring on other blogs?
I have a blog centered on the same topics
you discuss and would love to have you share some stories/information. I know my
visitors would appreciate your work. If you’re even remotely interested, feel free to shoot me an email.